
Transform your bedroom into an Instagram-worthy maximalist paradise without emptying your wallet. This comprehensive guide shows you exactly how to achieve that high-end look for less!
Why Pink Maximalism Is Having a Moment
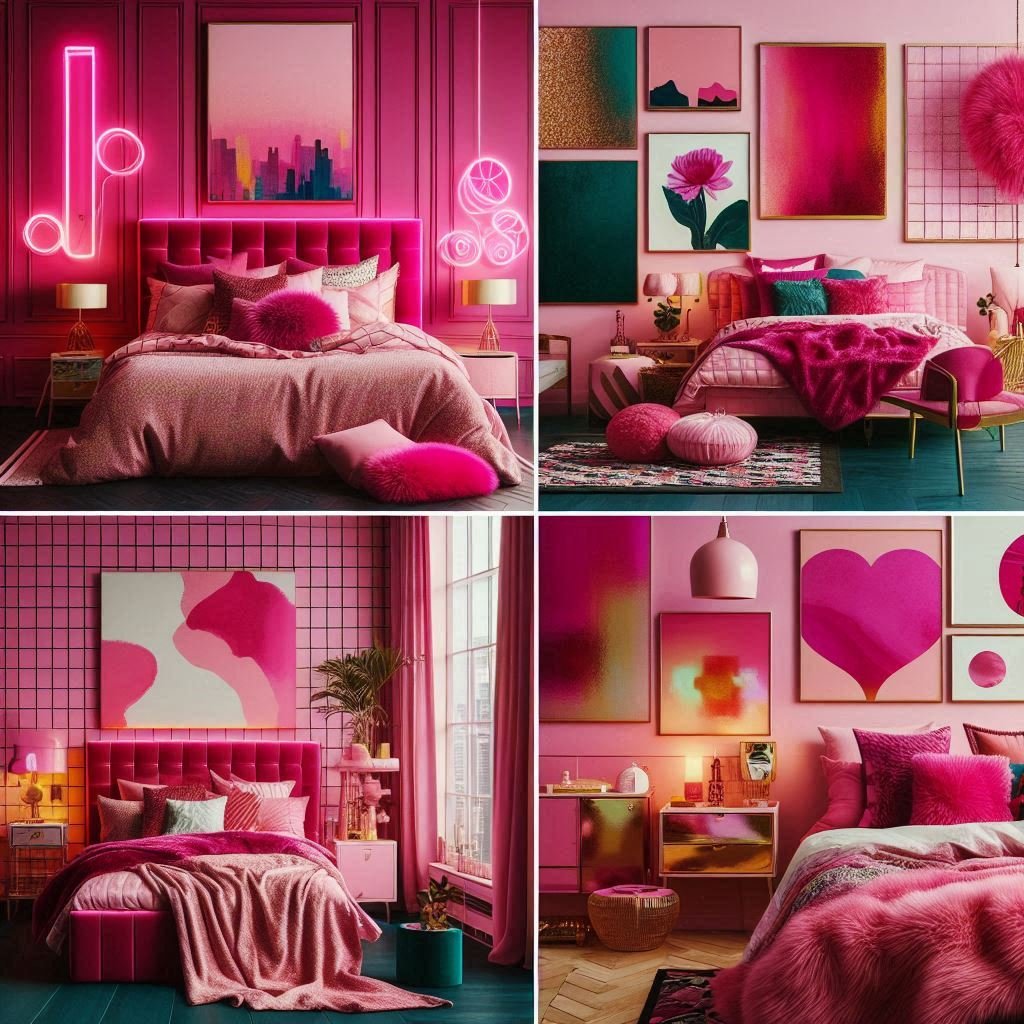
Gone are the days of “less is more.” Today’s interior design celebrates personality, abundance, and joy – and nothing embodies this better than pink maximalism. But here’s the secret that high-end designers don’t want you to know: achieving this luxurious look doesn’t require a massive budget.
As someone who transformed my own bedroom from bland to grand on a tight budget, I’m sharing all my insider tricks for creating a pink maximalist haven that looks expensive but isn’t. Whether you’re working with a $100 or $1000 budget, these ideas will help you achieve your dream space.
Looking for even more budget-friendly bedroom transformations? Check out these stunning sage green and pink bedroom ideas for inspiration!
Understanding Maximalist Design Principles
Before diving into specific projects, let’s master the four core principles that make maximalist design work:
- Color Layering
- Start with a pink base palette (2-3 shades)
- Add 2-3 complementary colors
- Incorporate metallic accents
- Use the 60-30-10 rule for color distribution
- Pattern Mixing
- Combine large, medium, and small-scale patterns
- Keep patterns within your color palette
- Mix organic and geometric designs
- Include at least one animal print
- Texture Building
- Layer smooth with rough
- Incorporate plush elements
- Add natural materials
- Mix matte and glossy finishes
- Statement Pieces
- Choose one major focal point
- Add 2-3 secondary statement pieces
- Balance bold with subtle
- Maintain visual flow
Essential Pink Maximalist Elements
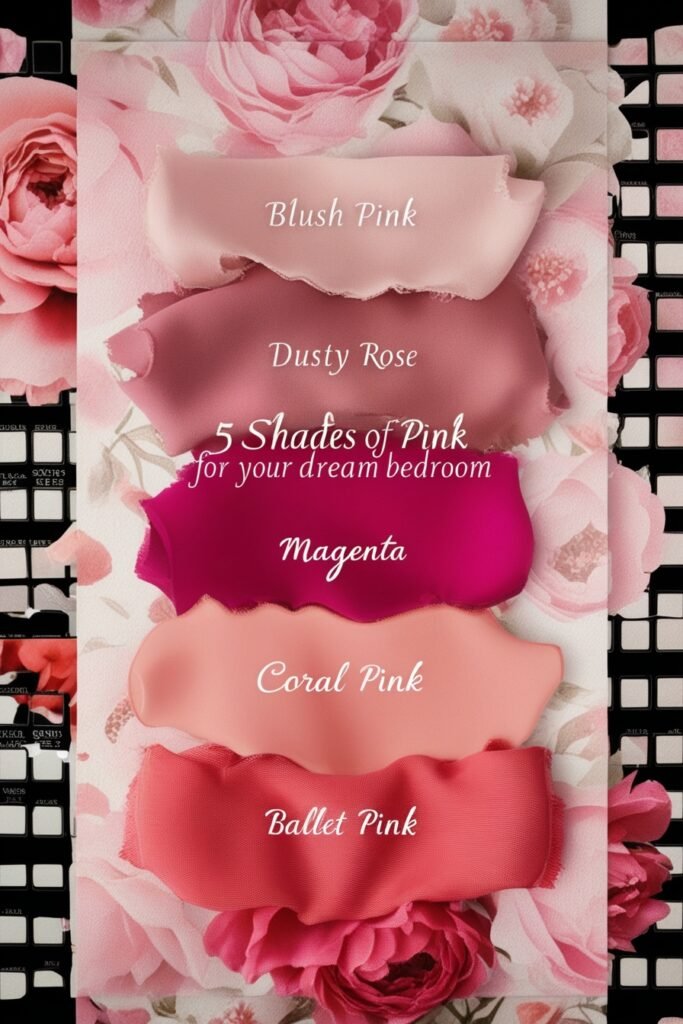
Base Colors to Consider
Your pink palette will set the foundation for your entire design. Here are the most versatile options:
- Blush Pink: Perfect for walls and large furniture pieces
- Dusty Rose: Ideal for textiles and accent pieces
- Magenta: Great for bold statements and artwork
- Coral Pink: Excellent for warming up a space
- Ballet Pink: Beautiful for subtle details
Top Selling Item

PRESTIGE Paints Interior Paint. Match of Benjamin Moore* Pink Cloud*
$53.99
Most Recommended

PRESTIGE Paints Interior Paint. Match of Benjamin Moore* Pure Pink*
$53.79
Top Rated

PRESTIGE Paints Interior Paint. Match of Benjamin Moore* Pink Ladies*
$57.99
Must-Have Items
- Statement Wall Treatment
- Peel-and-stick wallpaper
- Hand-painted mural
- Gallery wall
- Painted arch
- Layered Textiles
- Velvet pillows
- Tasseled throws
- Patterned curtains
- Textured rugs
- Vintage-Inspired Pieces
- Gold-framed mirrors
- Victorian-style frames
- Ornate lamps
- Antique-look vases
- Bold Artwork
- Oversized prints
- Mixed media pieces
- Framed fabric
- Personal photos
Love the charm of vintage decor? Discover unique thrift store treasures in our post on vintage finds for a stylish apartment.
Budget-Friendly Shopping Guide
Where to Find Deals
Thrift Stores
- Best days: Tuesday and Wednesday mornings
- Check wealthy neighborhood locations
- Look beyond current condition
- Focus on solid wood pieces
Online Marketplaces
- Facebook Marketplace
- Craigslist
- NextDoor
- eBay for vintage finds
Seasonal Sales
- January white sales
- Memorial Day furniture sales
- Black Friday decor deals
- End-of-season clearance
Upcycling Sources
- Estate sales
- Yard sales
- Flea markets
- Curb alerts
DIY Projects for a Pink Maximalist Bedroom
1. Painted Wall Mural
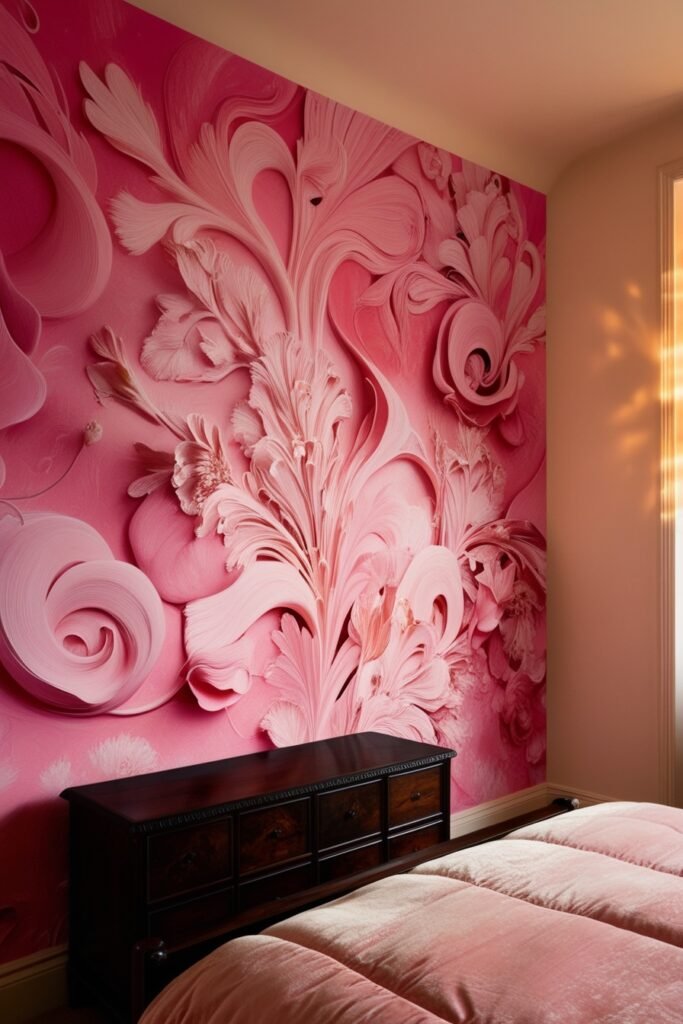
- Description: Transform a focal wall with a stunning mural to create a vibrant atmosphere.
- Materials Needed:
- 2-3 shades of pink paint
- Painter’s tape
- Level
- Pencil
- Paint brushes and roller
- Instructions:
- Clean and prep your wall.
- Lightly sketch your design in pencil.
- Tape off sections for clean lines.
- Paint the lightest color first.
- Layer darker shades over the lighter base.
- Remove the tape while the paint is slightly wet for clean edges.
- Touch up any edges as needed.
Transform your space with these expert tips on mixing eclectic decor accessories for a personalized, vibey look.
2. Fabric-Covered Headboard
- Description: Create a luxurious headboard that rivals high-end designs.
- Materials Needed:
- Plywood board (cut to desired size)
- High-density foam
- Batting
- Velvet or patterned fabric
- Buttons for tufting
- Staple gun
- Mounting hardware
- Instructions:
- Cut the plywood to the desired headboard size.
- Attach the foam to the plywood using spray adhesive.
- Layer batting over the foam for extra comfort.
- Pull the fabric tightly over the batting and staple it securely to the back.
- Add tufting with buttons if desired.
- Mount the headboard to the wall securely.

3.Statement Wall Treatments
- Description: Enhance your wall with striking treatments to make a strong visual impact.
- Options:
- Peel-and-stick wallpaper for easy application.
- Hand-painted murals for a personalized touch.
- Gallery walls with a mix of artwork and photographs.
- Painted arches for a whimsical look.
- Instructions: Choose one or more treatment options above and follow specific installation instructions provided with the materials.
For an easy upgrade, check out this beautiful floral peel-and-stick wallpaper that complements the pink palette perfectly.

Floral Wallpaper Peel and Stick
$39.99

Watercolor Floral Wallpaper
$19.90

Pink Floral Wallpaper
$14.68
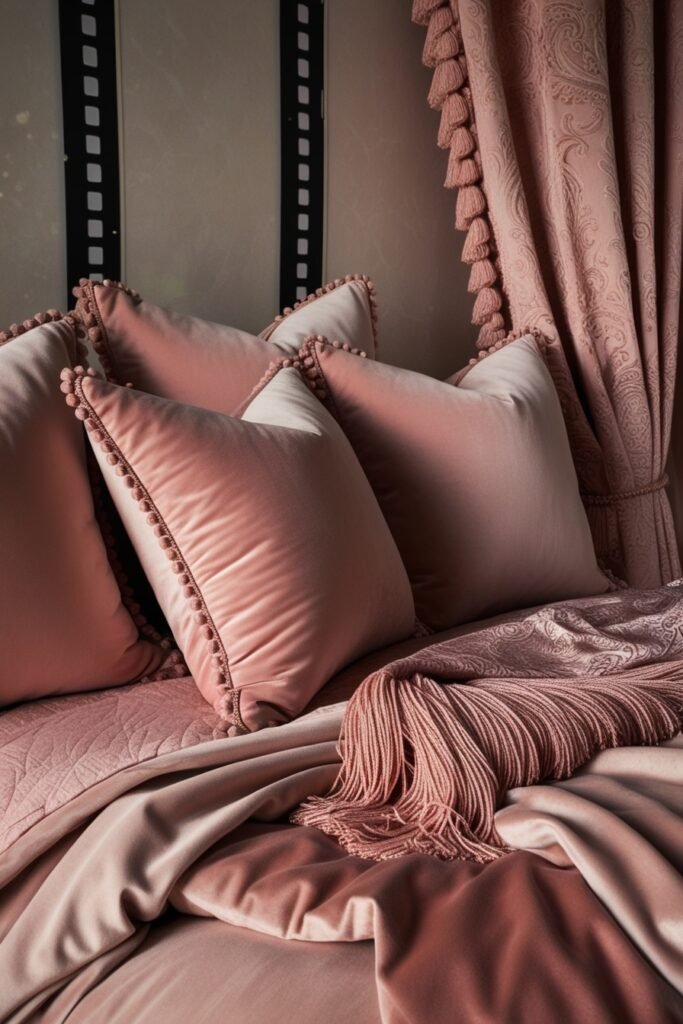
4. Layered Textiles
- Description: Incorporate various textures with textiles to create a cozy, layered look.
- Materials Needed:
- Velvet pillows. Add depth with velvet throw pillows that are both stylish and comfy.
- Tasseled throws
- Patterned curtains
- Textured rugs. A soft area rug can tie the room together and enhance the cozy feel of your pink maximalist haven.
- Instructions:
- Select a color palette that complements your pink theme.
- Layer pillows of different sizes and textures on your bed or sofa.
- Use throws for added comfort and visual interest.
- Ensure your curtains are of varying textures for a rich appearance.
Can’t get enough of dreamy bedrooms? Don’t miss our guide to creating a pink oasis on a budget!
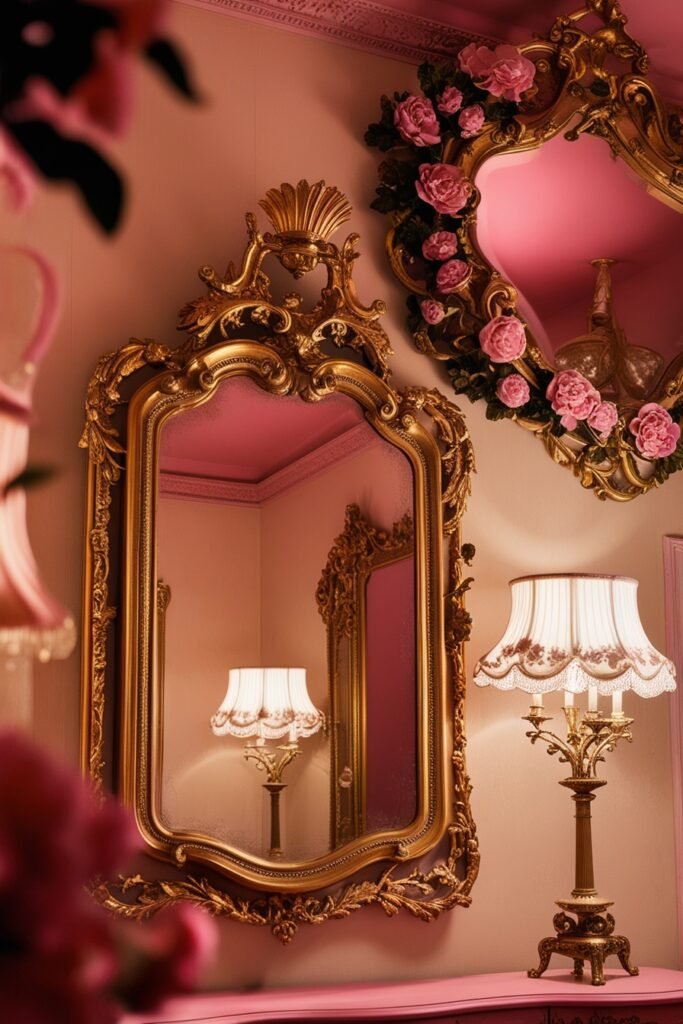
5. Vintage-Inspired Furniture Updates
- Description: Infuse your space with vintage charm through DIY updates.
- Materials Needed:
- Vintage furniture pieces (e.g., mirrors, lamps, frames)
- Paint or refinishing materials if needed
- Decorative hardware
- Instructions:
- Find vintage pieces at thrift stores or online marketplaces.
- Clean and restore the pieces as necessary.
- Update hardware for an instant refresh.
- Paint or refinish to fit your color palette.
Incorporate vintage charm with a gold-framed mirror that adds elegance to your space.

Love vintage-inspired vibes? Don’t miss these charming home office decor ideas.
6. Bold Artwork Arrangements
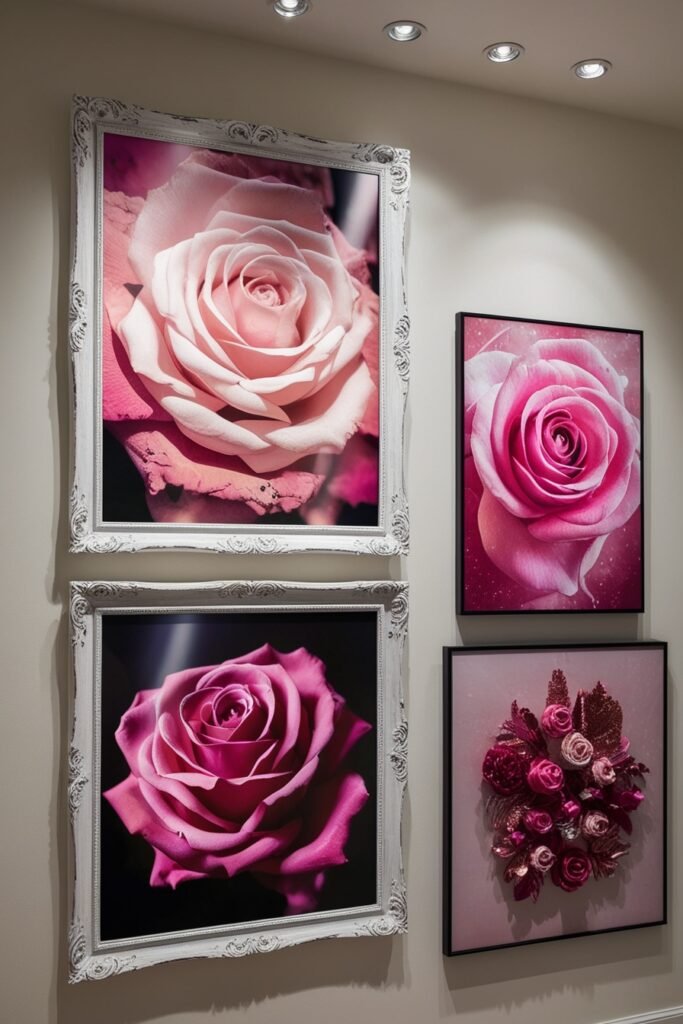
- Description: Curate art pieces effectively to create a dynamic visual display.
- Materials Needed:
- Oversized prints or canvases
- Mixed media pieces
- Framed fabric or photographs
- Instructions:
- Choose artwork that complements your bedroom color scheme.
- Arrange pieces on the floor before hanging to find the best layout.
- Mix different frame styles and sizes for an eclectic look.
- Hang the largest piece first to anchor the arrangement.
7. Creative Furniture Painting
- Description: Revamp old furniture pieces with fresh paint to suit your style.
- Materials Needed:
- Sandpaper
- Primer (if necessary)
- Paint (preferably in bold colors)
- Paint brushes or rollers
- Instructions:
- Clean the furniture thoroughly and sand down surfaces.
- Prime if necessary, depending on the original finish of the piece.
- Apply paint using your choice of technique (e.g., solid color, color blocking).
- Let dry completely before applying a second coat if needed.
Popular Reads: Transforming Your Bedroom Into A Dreamy Pink Oasis On A Budget
8. Reupholstery Basics
- Description: Revamp tired furniture pieces by recovering them with fresh fabric for a new look.
- Materials Needed:
- New fabric (choose a bold or patterned design)
- Staple gun
- Flathead screwdriver
- Scissors
- Foam (if extra cushioning is needed)
- Instructions
- Remove Old Fabric: Use a flathead screwdriver to carefully pry off any staples and remove the old fabric.
- Document Process: Take photos of the disassembly process to reference during reassembly.
- Prepare New Fabric: Cut the new fabric, leaving an extra inch or two around the edges for stapling.
- Install Foam (if needed): If you’re adding foam for extra comfort, cut it to size and place it on the furniture.
- Attach New Fabric: Start from the center of one side, pulling the fabric tight and stapling it in place. Work your way toward the corners.
- Finish and Tuck: Once all sides are attached, tuck in any excess fabric, and secure with additional staples as needed.
- Reattach Any Removed Hardware: Put any finishing touches back in place, like legs or decorative nails.
Want more thrifted style inspiration? Check out these unique vintage decor ideas for your home
9. Layered Textiles
- Description: Create a cozy and inviting atmosphere by using various textures and layers of fabric.
- Materials Needed:
- Velvet pillows
- Tasseled throws
- Patterned curtains
- Textured rugs
- Instructions:
- Choose a Color Scheme: Select colors that complement your pink maximalist theme.
- Layer Textiles on the Bed: Start with your duvet or comforter, then add a light coverlet, followed by decorative throws.
- Use Different Textures: Incorporate different fabrics like velvet for pillows and cotton for throws for visual interest.
- Pillow Arrangement: Use a mix of sizes—two large square pillows, two medium squares, and a couple of smaller accent pillows.
- Curtains: Hang patterned curtains and layer them with sheer options for a light-and-airy feel.
Top Selling Item

Pink Butterfly-Shaped Glitter Velvet Throw Pillow
$36.99
Most Recommended

Star Blackout Curtains for Bedroom, Double Layer
$39.99
Top Rated

Pink Area Rug for Bedroom, 5×7 Fluffy Soft Plush Area Rug
$39.97
Curious about mixing even more patterns and textures? Explore this eclectic decor guide to get inspired.
10. Creating Focal Points with Gallery Walls
- Description: Design a gallery wall that becomes a stunning focal point and showcases your personality.
- Materials Needed:
- A mix of framed artwork, photographs, and fabric pieces
- Thrifted or dollar store frames (spray paint if needed)
- Level or ruler for alignment
- Instructions:
- Choose Your Art: Gather various media, such as prints, personal artworks, and framed fabric scraps.
- Layout Design: Lay out your frames on the floor to find an arrangement you like before hanging.
- Anchor the Arrangement: Start with the largest piece in the middle, then build around it with smaller frames.
- Hang the Frames: Use a level to ensure that everything is aligned neatly.
- 3D Elements: Consider incorporating a small shelf for decorative objects to add depth.
11. Statement Lighting
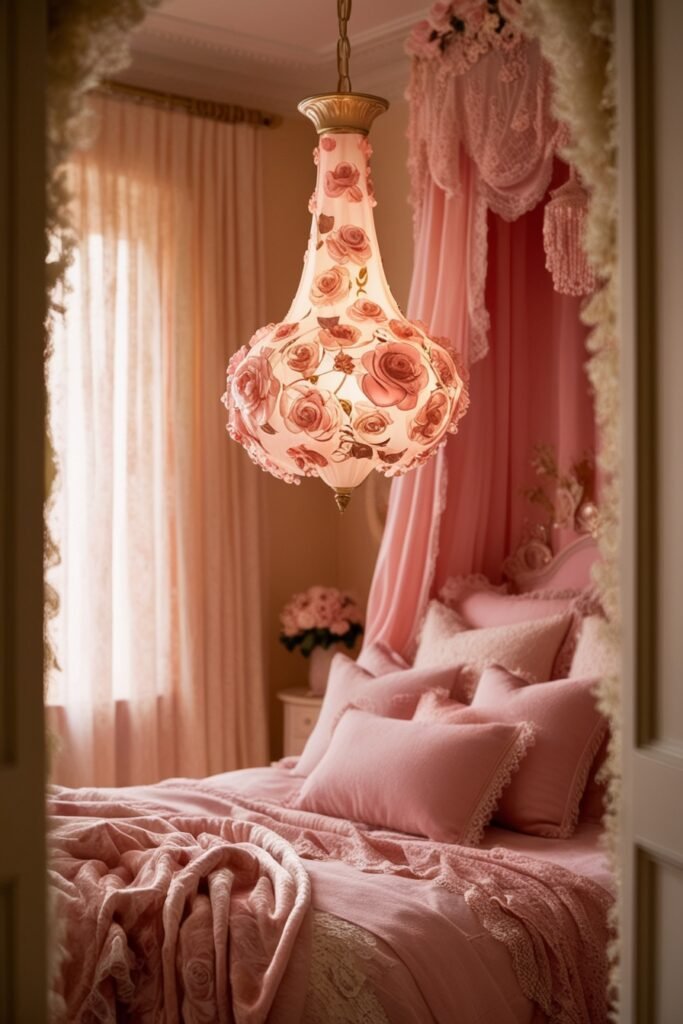
- Description: Make a bold statement in your room with unique lighting fixtures.
- Materials Needed:
- DIY pendant light covers
- Paint for updating lampshades
- Decorative string lights
- Instructions:
- Transform Existing Fixtures: Use paint to update old lampshades or create new covers for pendant lights.
- Add String Lights: String lights can be incorporated along shelves or above the bed for warm ambiance.
- Chandelier Makeover: If you have an old chandelier, consider giving it a fresh coat of paint or adding floral elements to make it pop.
Make a statement with a stunning chandelier that brightens up your space beautifully.
Top Selling Item
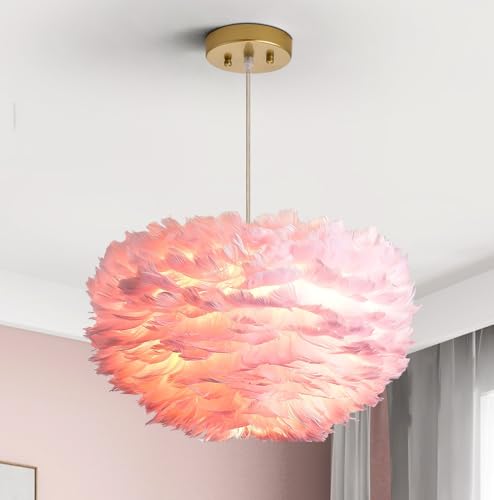
Nordic Feather Chandeliers
$119.99
Most Recommended
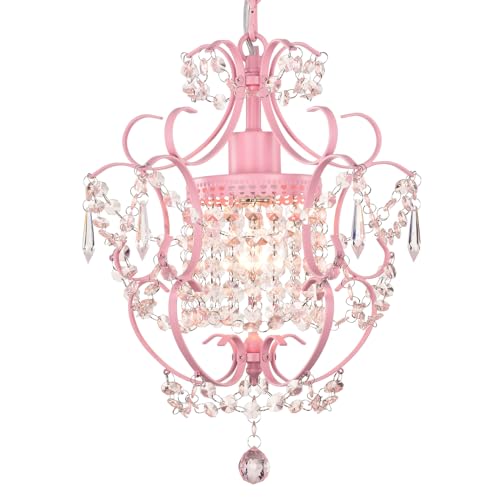
Pink Chandelier for Bedroom
$59.78
Top Rated

Pink Chandelier Crystal
$79.99
12. Architectural Elements
- Description: Add character to your bedroom through architectural details without major renovations.
- Materials Needed:
- Stick-on moldings
- Paint for arches or wainscoting
- Decorative ceiling medallions
- Instructions:
- Stick-on Moldings: Measure and cut lengths of molding to create decorative frames around windows or doors.
- Painted Features: Add color to existing architectural features or create faux accents like wainscoting with paint.
- Ceiling Medallions: Install decorative medallions on the ceiling around light fixtures to draw the eye upward.
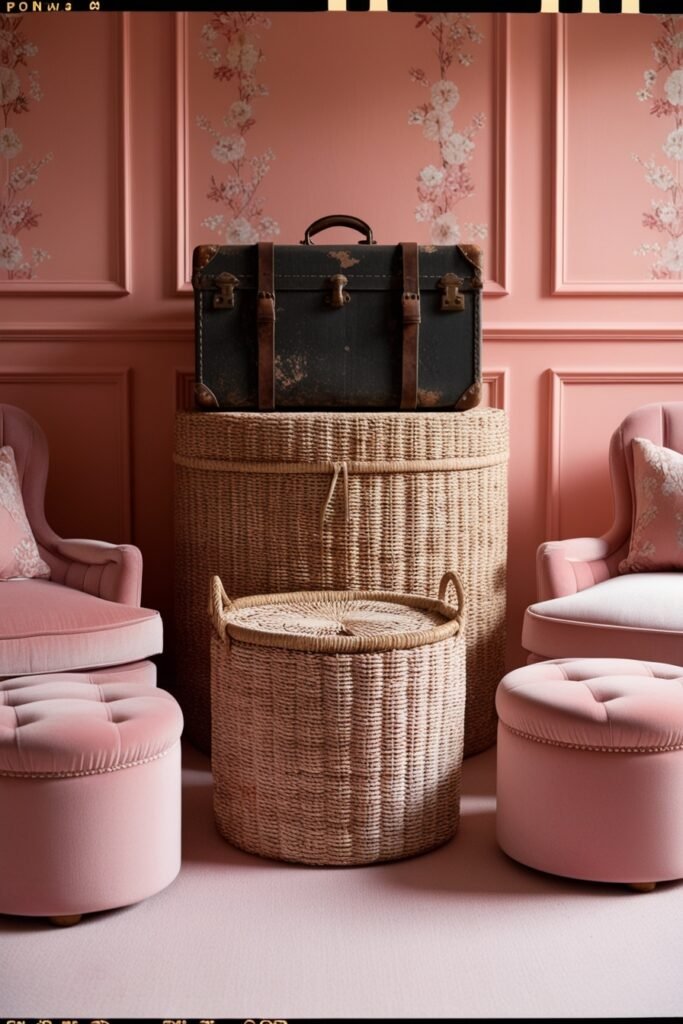
13. Decorative Storage Solutions
- Description: Efficiently store items while enhancing your decor through pretty storage options.
- Materials Needed:
- Vintage suitcases
- Decorative boxes (wooden, fabric, or painted)
- Glass jars with decorative lids
- Fabric-covered bins
- Instructions:
- Choose Your Storage Items: Select vintage suitcases or decorative boxes that align with your pink aesthetic.
- Paint or Cover: If necessary, paint or recover boxes and bins to match your decor.
- Arrange Neatly: Use suitcases as side tables or under-bed storage, while jars and bins can be displayed on shelves for easy access and added charm.

14. Creative Shelving
- Description: Display your collections attractively with styled shelves that tell a story.
- Materials Needed:
- Shelves (floating, built-ins, or traditional)
- Decorative objects (figurines, books, plants)
- Personal items (photos, souvenirs)
- Instructions:
- Shelf Layout: Divide your shelf space as follows:
- Balance and Height: Arrange items by height for visual interest, ensuring a balance of colors and textures.
- Layering: Consider using books or larger items as bases for smaller decorations.
15.Hidden Storage Solutions
- Description: Maximize functionality in your space while keeping the aesthetic appeal.
- Materials Needed:
- Under-bed rolling drawers
- Ottoman storage benches
- Hollow decorative books (fake books that open)
- Behind-mirror cabinets
- Instructions:
- Utilize Under-Bed Space: Invest in rolling drawers that fit under your bed for storing off-season clothing or extra linens.
- Ottoman Use: Choose storage ottomans that can double as seating or footrests.
- Clever Items: Use decorative fake books that open to hide smaller items or knick-knacks.
- Mirror Cabinets: Hang cabinets behind mirrors for a chic and seamless storage solution.

Practical Tips and Tricks
Cost-Saving Strategies
- Shop off-season
- Use paint for major impact
- DIY artwork
- Repurpose existing items
Time-Saving Techniques
- Plan layout before starting
- Prep all materials in advance
- Batch similar projects
- Create project timelines
Common Mistakes to Avoid
- Buying everything at once
- Ignoring scale
- Skipping proper prep work
- Following trends blindly
Final Tips for Success
Maintenance Guide
- Rotate accessories seasonally
- Clean and touch up paint regularly
- Replace worn items promptly
- Update styling monthly
Styling Schedule
- Weekly: Fresh flowers or plants
- Monthly: Switch accent pieces
- Seasonally: Update textiles
- Yearly: Major refresh
Conclusion
Ready to create your pink maximalist paradise? Start with one project this weekend – I recommend the painted wall mural for maximum impact with minimum investment. Save this guide for future reference and join our community of maximalist decorators!
Looking to mix pink with complementary tones? Try these chic sage green and pink bedroom ideas!
Pin It For Later
- Save the pattern mixing guide
- Bookmark the DIY projects
- Pin the color palette suggestions
- Share your before and after photos
Remember, creating your dream maximalist bedroom is a journey, not a race. Take your time, collect pieces you truly love, and let your personality shine through every element. Happy decorating!
[Want more maximalist inspiration? Follow our Pinterest board for daily updates and exclusive tips → https://ca.pinterest.com/cozycreativeshub/pink-bedroom-decor-ideas/]
Frequently Asked Questions
Q: How do I prevent my maximalist room from looking cluttered?
A: Focus on intentional groupings, maintain clear paths, and include negative space. Edit regularly and ensure every item serves a purpose or brings joy.
Q: What’s the best pink paint color for maximalist bedrooms?
A: Benjamin Moore’s “Pink Cloud” or Farrow & Ball’s “Calamine” provide perfect base colors that work well with multiple accent shades and patterns.
Q: How can I incorporate existing furniture into a maximalist design?
A: Paint pieces in coordinating colors, add new hardware, and update with maximalist textiles. Focus on creating cohesion through color and pattern.
Q: Where should I invest vs. save in maximalist decor?
A: Invest in quality bedding, comfortable seating, and good lighting. Save on decorative accessories, artwork, and small furniture pieces that can be DIYed.